


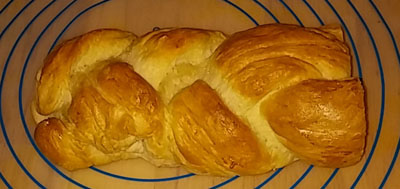
French Bread Braid
It has probably been over 30 years since I made bread.
When I decided to make bread again, just a week ago, I found what I thought was a decent bread recipe and took the plunge. I found a simple Amish White Bread recipe on Allrecipes.com. It called for 6 simple ingredients: Water, sugar, active dry yeast, salt, vegetable oil, and bread flour. All of which are ingredients that I already had in my pantry. I don’t remember why I had the yeast, but it was there, too.
But, hold on a second…
Bread flour? Hmm, all I had in my pantry was self-rising flour. I use it for my batter when I’m frying coconut shrimp, fried fish, or onion rings. I asked myself, “What’s the difference?” I mean, self-rising flour sounds to me like it would make the bread rise, right? ![]()
My First Attempt at Baking Bread
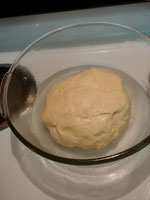
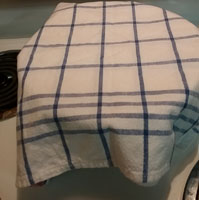
So, following the directions for Amish White Bread to a tee, except for the self-rising flour, that is, I proofed the yeast with warm water and sugar, and that was successful. I added the remaining ingredients, salt, oil, flour. I rolled it out onto a cutting board and kneaded it for what seemed like forever, approximately 10 minutes. I placed it in a greased bowl, covered it with a dish towel, and let it rise for an hour. I punched it down (in other words, I let the air out), kneaded it for a few more minutes and divided it in half. I then shaped one half into a loaf, and placed it on a baking sheet (would you believe, I hadn’t used a loaf pan in years and it got lost in the last move). I covered it with plastic wrap and let it rise for 30 minutes. Then, I placed the baking sheet into a 350 degree oven and baked it for 30 minutes. Easy, peasy, right? Actually, it really is easy, it’s just that it can be time-consuming, with all the kneading and rising, and kneading some more, and shaping, and more rising…well, you get the idea. It’s best to start early, and then, while the bread is rising, I just go about my business getting other work done.
Finally! My beautiful loaf of bread was done. I removed it from the oven and let it sit for about 10 minutes. I then turned it out of the pan onto the wire rack and let it cool completely.
I never did take a picture of it. I wasn’t even thinking of documenting my experiment and posting it on my blog. What was I thinking?
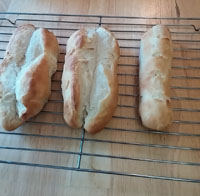
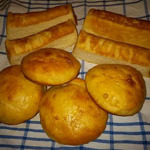
The bread was very dense, not soft and fluffy like bread should be, and it was hard and crumbly and just fell apart. I used the other half to form three hoagie rolls and baked them, too. But, those turned out just as bad. I did take the following photo of the hoagie rolls that came from the same batch of dough. You can probably see from the photo that the bread is more like shortbread, dry, hard, dense and crumbly.
It just goes to show you, one little mistake, like using the wrong flour, can ruin the whole recipe. 🙁
Also, that was the only time I tried kneading my bread by hand.
If at first you don’t succeed…
So, back to the drawing board, or should I say bread board? I thought, before I try again, I should do a little research – ya think? The following tips that I picked up in the last few days helped me understand how each ingredient affects bread baking. For instance,
Flour
The standard for making bread is Bread Flour. Other flour can be substituted for part or all of the bread flour. Just remember that white bread flour contains the most gluten, which makes bread rise higher. Other flours will make bread more dense and will not rise as much. And, as I found out from my first attempt at baking bread just the other day, self-rising flour has the least amount of gluten. Flour that contains very little or no gluten must be added to part bread four. For example, rice and corn flour have no gluten. Other flours include whole wheat, rye, oat, soy, and others.
Many of the recipes that I found use all-purpose flour. This seems to be a good substitute for bread flour if that’s all you have in the cupboard. I used all-purpose flour in my next couple of experiments, since that’s what the recipes called for. See a photo of my hamburger and hot dog buns below. They were so much fun to make, but still need some practice. 🙂
Potato Flour/Potato Flakes
According to King Arthur Flour, “Potato flour, ground from peeled, dried potatoes, is invaluable to bakers looking for a moist yeast bread with excellent shelf life. Breads and rolls made with potato flour have a soft, moist texture that’s hard to match. Potato flour also makes dough easier to shape and handle; it increases its extensibility… The starch in potato flour attracts and holds water; substitute 1/4 cup of potato flour for 1/4 cup of the flour per loaf.” I used mashed potato flakes since I didn’t have any potato flour. The ratio would be to add 1/4 cup potato flour or 2/3 cup instant mashed potato flakes per 3-cup flour recipe.
Active Dry Yeast
Most of the recipes I’ve found, so far, call for active dry yeast. I used the packaged kind, which should be mixed with warm water and sugar before it is used. One package of active dry yeast equals 7 grams, 1/4 ounce, or 2-1/4 teaspoons. One 1/4 ounce package of active dry yeast is good for 1 or 2 loaves of bread (3-1/2 to 6-1/2 cups of flour). Whether it is required or not, I prefer to proof my yeast to make sure that it is active. In most cases, fast-rising or instant yeast can be used without proofing first. A container of active dry yeast must be well sealed and refrigerated or frozen.
To proof yeast: In the same bowl that you will use to make your dough, start by adding hot tap water (temperature must be between 105 and 115 degrees) and whisk sugar until dissolved. Sprinkle yeast on top and stir. Let sit for 10 to 15 minutes, until it looks foamy. The water must be warm in order to activate the yeast, but if it is too hot it will kill the yeast.
Fat
Fat added to bread dough will inhibit the formation of gluten. The bread will not rise as much as a loaf made without fat. On the upside, fat, especially butter and olive oil, add a lot of flavor to the bread. Butter keeps the crumb tender and will improve the shelf life by a day or so. Almost any fat can be added to a bread dough, such as butter, margarine, vegetable oil, olive oil, and shortening.
Eggs
Eggs added to dough help with rising. Eggs are a leavening agent and will make the bread dough rise very high. Also, the fat from the egg yolk will help tenderize the crumb and lighten the texture a bit.
Sugar
When proofing the dough, the yeast eats some of the sugar. Adding a little extra sugar will add flavor and sweetness to the bread. It also helps with browning, tenderizing and holds onto moisture to help keep from getting stale. However, too much sugar will inhibit gluten production which, of course, will become more dense and won’t rise as much. Therefore, try to keep the sugar to a minimum using approximately 2 tbsp of sugar per cup of flour. In most of the breads that I have made lately, I have used 2 to 3 tbsp of sugar for 3-cups of flour (one loaf). Also, for added moisture, you could try adding honey, maple syrup, or molasses.
Salt
Always use the recommended amount of salt. Salt helps strengthen the gluten. Too much salt will affect the way the yeast works.
Milk
Milk vs. Water?
Substituting milk for water will produce a sweeter, more tender loaf of bread. The sugar in milk, which is lactose, is not eaten by the yeast, so it is left to add more sweetness to the bread. It also adds some nutritional value because of the additional protein. The bread will also assist in browning the bread.
When researching milk vs. water, I read that using milk instead of water will produce a slack and softened bread with minimum oven spring. Apparently, it includes an agent known as Glutathione, which will reduce your bread to a soft dough. We must first destroy this agent before adding it to the ingredients.
To do this, the milk must be brought to a temperature of 190 degrees. I assume that this is why many bakers that use milk in their bread, scald it first. Then, add a little cold water to bring the temperature back down to 110 degrees.
I also read that you should proof the yeast with warm water (105 to 110 degrees), and add the milk after. But, if you proof the yeast with milk, scald it first and then lower the temperature or it will kill the yeast. Wow! So many variations and things to think about. I can see why it would be easy to ruin what seemed like an easy recipe.
However, I’m pretty sure this problem is solved with pasteurized milk.
To avoid the issue of whether to scald the milk, use 1/4 cup Baker’s Special Dry Milk or nonfat dry milk instead of liquid milk. It tastes just like regular milk when it’s in bread, even if it doesn’t taste so good otherwise.
In Summary
So, what have I learned from all of this? Well, let me see if I can summarize it a bit.
First, use bread flour or All-Purpose Flour. Bread flour has more gluten and will rise higher, but many recipes call for all-purpose flour and I have had success with it, so far. I used all-purpose flour for my hamburger and hot dog buns, and they came out great!
Then, use fat. Butter adds a lot of flavor to the bread, and keeps the crumb tender and will improve the shelf life.
Then, use eggs. This helps make the bread rise, and it tenderizes the crumb.
Add some additional sugar. It will add sweetness to the bread, tenderizes and holds onto moisture to keep from getting stale. Just don’t use too much or it will inhibit the bread from rising. Use approximately 1 tbsp of sugar per cup of flour.
Then, use half milk and half water. Milk produces a sweeter, more tender loaf of bread, if that’s what you’re going for. In the meantime, until I find out for sure, I will scald the milk and then bring it back down to 105 to 110 degrees. Otherwise, try dry powdered milk.
Another addition that I made was potato flakes, since I didn’t have any potato flour on hand. My rolls came out great!
*So, it sounds like if I do all of that I will end up with pretty sweet and tender bread. There does seem to be some redundancy, and it might end up a little too sweet and tender, but it still sounds scrumptious.
*Note: I just tried this with my hamburger and hot dog buns, and they came out scrumptious! Light, fluffy, sweet and tender. I have also made bread with no eggs or milk, and still came out pretty good. Links to my bread posts are below:
My Favorite Hamburger and Hot Dog Bun Recipe. This is also the same recipe I use for bread.
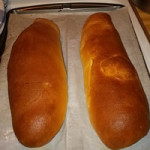
Fresh Baked Sub Rolls
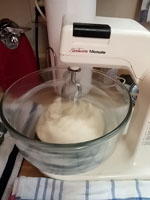
I now use my old Sunbeam Mixmaster with the dough hooks. Up until now, my standing mixer has only been known as the “mashed potato machine”. Now, I’ve fallen in love with it all over again. Everyone I know has a nice, and expensive, Kitchenaid stand mixer. But, my 30-something year old Sunbeam Mixmaster is all that I need (as long as it lasts, knock on wood). It does shake quite a bit when mixing the thick dough. I have to place a damp towel in front of it so that it doesn’t jump right off the counter! I prefer to do smaller batches, 3 to 3-1/2 cups of flour per loaf, where the dough is much easier to handle. However, I have also done a large batch of 6 to 7 cups of flour for two loaves of bread.
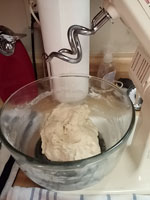
Place dough in stand mixer
Mix dough for 6 minutes, 10 if kneading by hand
Clean bowl, spray with oil, and place dough in bowl
Set in a warm space. Cover with plastic wrap or towel and let rise for 1 to 2 hours, until doubled in size.
Using all-purpose flour, I then decided to make hamburger and hot dog buns.
My inspiration for these buns came from Allrecipes’ Chef John. I also decided to make New England style buttery, toasted hot dog buns. The ones that I remember from Howard Johnson’s, where they grilled the hot dogs and the buns. I will provide the link to my bun recipes as soon as I can.
I haven’t used it, yet, but I just bought a New England style hot dog bun pan. In the meantime, I sliced off the sides of these hot dog buns and grilled them along with the hot dogs, buttering them the same way I do with grilled cheese sandwiches. They were so much better than the photos!
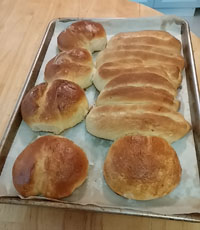
My first homemade hamburger and hot dog buns – they turned out delicious, thanks to Chef John!
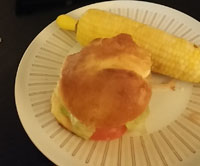
Half-eaten hamburger bun
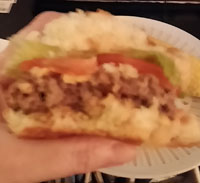
Half-eaten hamburger

New England style grilled hot dog
The following photos show my new bread making setup.

Years ago, I never made anything real fancy, although a braided loaf of bread, as easy as it is to make, looks very impressive. If you’re a beginner at baking bread, I would suggest making a braided loaf of bread for your first endeavor. This will impress your family and friends to no end, and they will only encourage you to keep on baking! I will post my recipe when I make another French braided bread. Meanwhile, check out the link below for Just a Pinch Recipes’ French Bread Braid.
French Bread Braid
Resources:
Instructables – Homemade Bread Recipe
Reluctant Gourmet – Bread Making Ingredients
King Arthur Flour – Water vs. milk as liquid ingredient in bread dough
The Fresh Loaf – What happens if I use Milk instead of Water for bread?
Diana’s Dessert – Tips for Breads, Biscuits, Rolls & Scones
Chef John’s Home-made Hamburger Buns
Just a Pinch Recipes – French Bread Braids

Latest posts by Susan (see all)
- My Second 5-Gallon Bucket Garden – Tomatoes, Red Bells, Green Beans and Herbs - June 25, 2016
- Roasted Eggplant Parmesan – Plus a couple of simple low carb recipes with Eggplant! - September 16, 2015
- Cauliflower Mac & Cheese - August 21, 2015