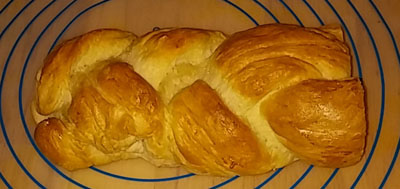
 I can’t tell you how delicious these buns are. You are just going to have to trust me and try them yourself. They came out just as I hoped. Light, fluffy, and sweet. The texture is perfect and won’t fall apart. This recipe makes a nice loaf of bread and dinner rolls, too.
Making the Dough:
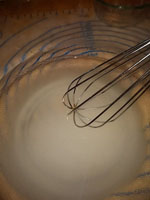
In large mixing bowl, dissolve sugar in water. Sprinkle yeast on top and stir. Let sit for 10 to 15 minutes, until foamy.
 Dissolve sugar in warm water Dissolve sugar in warm water |
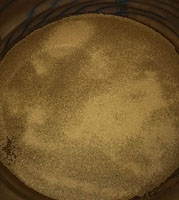 Add yeast and stir Add yeast and stir |
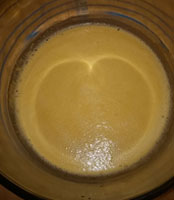 Let sit until foamy, 10 to 15 minutes Let sit until foamy, 10 to 15 minutes |
Whisk into yeast mixture eggs, salt, milk, and melted butter (always measure butter after it is melted).
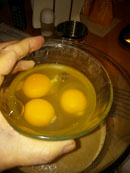 Add eggs
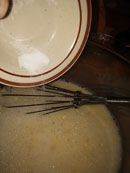 Add salt
 Add milk
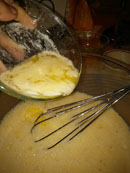 Add melted butter
Stir all liquid ingredients. Add potato flour/flakes, and all-purpose flour, one cup at a time. Mix well, pulling dough away from sides of bowl and form into ball.
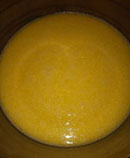 Stir all liquid ingredients
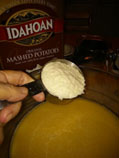 Add potato flour or flakes
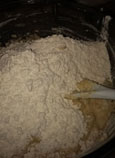 Add flour one cup at a time
 Mix well and form into a ball
Place bowl in stand mixer with dough hooks. Knead for 5 minutes, stopping to manually scrape dry flour mixture into the center, and until dough is soft and sticky (sweetened dough does not require as much kneading). Otherwise, knead by hand for 8 minutes. If the dough sticks to a silicone spatula add a little more flour.
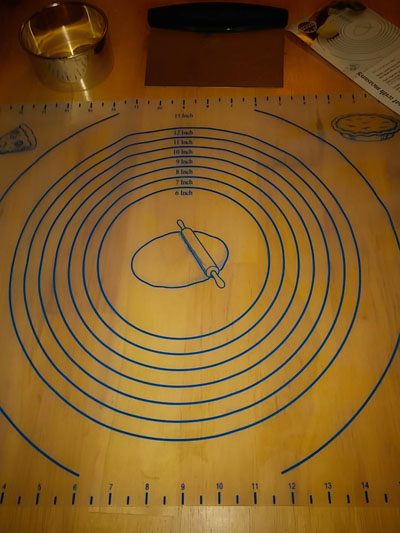
Transfer dough to a lightly floured surface. I use my new Norpro Silicone Pastry Mat with Measurements. Dough will be sticky and elastic but will not stick to your fingers.
Knead a few times, fold and form dough into a round ball, tucking loose ends underneath.
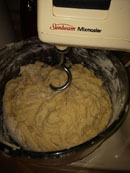 Using dough hooks, knead for 5 minutes
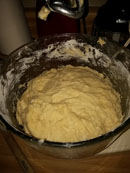 Kneaded dough
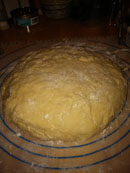 Transfer kneaded dough to flour surface
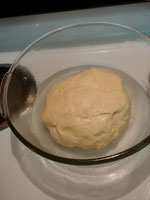
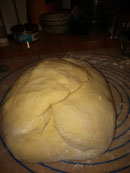 Knead a few times, fold and form into a ball
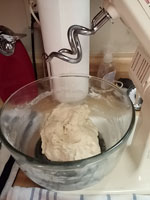
Wipe out stand mixer bowl and drizzle or spray bowl with olive oil. Turn dough over until thinly coated with oil on all sides. Cover bowl with foil, plastic wrap or a towel (not terry cloth). Let dough rise in a warm place for 1 to 2 hours, until doubled in size. For the 3-cup flour recipe, I like to use an 8-cup Pyrex measuring bowl so I can see how much it has risen. With my large stand mixer bowl, the 6-cup flour recipe rises to above the top of the bowl (see photo). Punch down (let the air out) and transfer risen dough from bowl to floured work surface. Divide in half.
 Clean bowl, spray or drizzle with oil
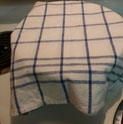 Place dough in bowl and turn to oil all sides
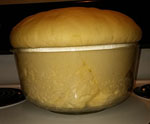 Set in a warm place and let sit 1 to 2 hours, until doubled.
 Punch down dough
Weighing and Dividing the Dough
I weighed the dough using my EatSmart Precision Pro Digital Kitchen Scale. It weighed 3.7 lbs., or approximately 60 ounces. Then, using my pastry scraper/chopper, I divided this into two sections, 30 ounces for the hot dog buns, and 30 ounces for the hamburger buns. That comes out to approx. 3 oz. per hot dog bun, and 3 oz. per hamburger bun, maybe a little less.
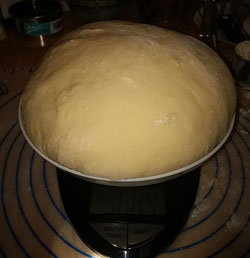 Weighing the dough
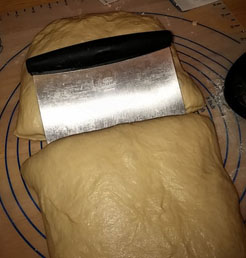 Dividing the dough
Directions for Hot Dog Buns
First of all, I am making New England style hot dog buns. If you are familiar with Howard Johnson’s buttery grilled hot dog buns, you’ll know what they are. Unlike regular hot dog buns that are rolled up into individual tube-shaped buns, these are baked in one long rectangle, then sliced on both sides and grilled, along side the hot dogs.
I just bought a New England style hotdog pan specifically for this recipe. As you can see from the photo, the pan has 10 sections on the bottom, which you don’t see when the dough is spread into the pan.
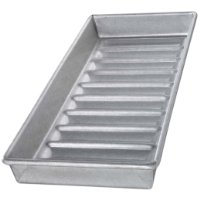 New England Style Hot Dog Pan
So, like I said, instead of rolling up individual buns, I rolled out the 30-ounce section of dough into a long rectangle, 6″ x 15″. I placed the dough into the pan, pushing it into all four corners, and leveling it as much as I could. Cover with lightly oiled plastic wrap and let rise for 25 to 45 minutes, or until the dough reaches the top of the pan.
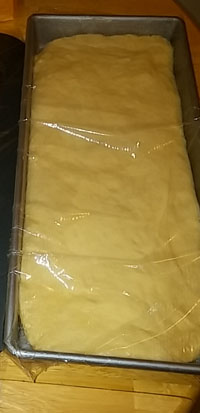
Hot dog buns rising
Brush melted butter along the top of the buns. Bake at 350 degrees for 15 minutes, or until golden brown.
Let the pan sit for 10 minutes, and then turn it out onto a wire cooling rack. Let cool completely.
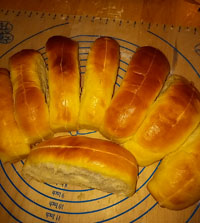
As you can see from the photos below, the bottom of the buns becomes the top, and the top becomes the bottom. The buns rose a bit more than I expected, so after they cooled, I trimmed off some of the excess. They still turned out pretty good. Slice buns along indentations. Then, slice down the center of each bun, but not all the way.
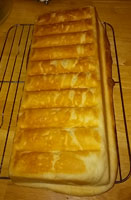
When turned out of pan, the bottom becomes the top
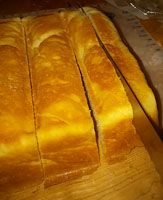
Slice each bun along indentations, and then again down the center but not all the way through
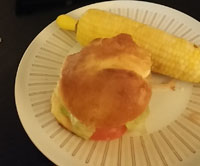
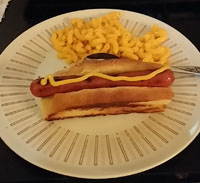
To grill hot dog buns, brush all sides with melted butter and place on grill or skillet, along side hot dogs, and grill until nice and toasty. Then, brush inside of each bun with melted butter, add grilled hot dog and favorite condiments. These grilled hot dogs are so good! I will never buy another hot dog bun again.
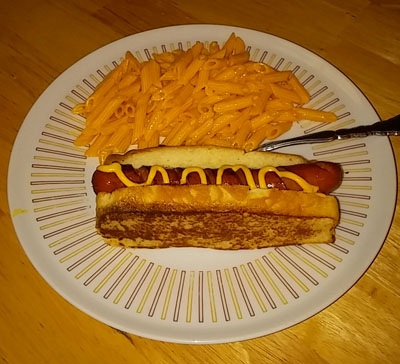 Grilled New England Style Hot Dog
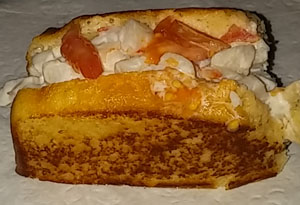
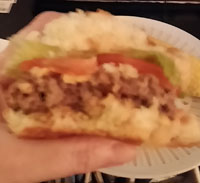
Grilled New England Lobster Roll –
I always forget to snap the photo before I start eating it *blush*.
If You Prefer Nicer Looking Buns:
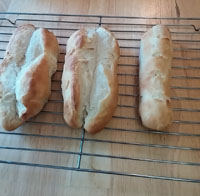
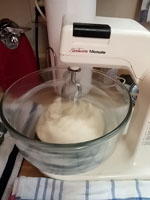
Okay, so afte reading an article about the New England Style Hot Dog Buns at The Fresh Loaf, I decided to give this a try. It is much more time consuming, but I have to admit the buns look very nice. They are rounded, instead of flat, since you don’t have to flip them over like you do with the New England Style Hot Dog Pan method, which is its intended use.
I rolled out a long rectangle, placed it in the greased hot dog pan, patting it down and into the corners. I then turned out the dough onto my pastry mat and divided them along the indented grooves. Very clever, I thought.:)
I then rolled each piece into a tube, pinched the ends and seams, and placed each one into each groove of the pan seam side down.
I baked them for 15 minutes. I remove them from oven and immediately brushed the tops with melted butter. I placed a dish towel over it and let sit for 30 minutes. The steam and the butter is what softens the crust, so this step is very important.
Directions for Hamburger Buns
Form the 30-ounce section of dough into a rectangle approx. 1/2″ thick. Cut into 10 pieces using a 3-1/2″ cookie cutter. These fit my muffin-top pan perfectly, except that it only holds 6 buns at a time. I was able to make four more with the remaining dough.
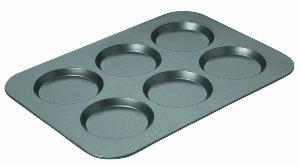 Muffin Top Pan
Cover with lightly oiled plastic wrap and let rise for 25 to 45 minutes, or until the dough doubles in size.
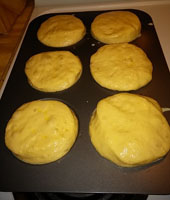
Hamburger buns after rising 45 minutes.
Whisk one egg with 2 tablespoons of water and brush top of buns with egg mixture. This will give it a nice shiny glow.
Bake at 350 degrees for 15 minutes, or until golden brown. Let sit for 10 minutes. Turn out onto a cooling rack and serve warm or cool completely before freezing.
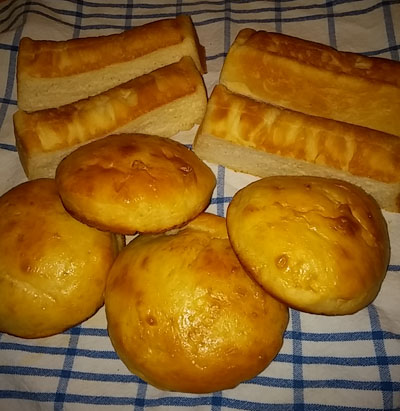
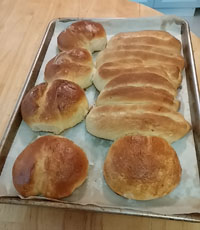
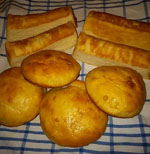
Hamburger and New England style hot dog buns
If you choose to bake bread instead of buns, follow these directions:
Directions for One Loaf of Sandwich Bread
Form 30-ounce section of dough into a loaf, approximately 9″ x 5″. Place into lightly oiled loaf pan. Cover with lightly oiled plastic wrap and let dough rise again for about 30 minutes, until it rises about one inch above the loaf pan.
Whisk one egg with 2 tablespoons of water and brush top of loaf with egg mixture. This will give it a nice shiny glow.
Bake at 350 degrees for 30 minutes, or until golden brown. Let sit for 10 minutes. Turn out onto a cooling rack and serve warm or cool completely before freezing.
Printable recipe without images:
Sandwich Bread, Hamburger and Hot Dog Buns
This is my recipe for light, fluffy, soft and sweet Hamburger and Hot Dog Buns
Ingredients:
1 loaf of bread, 10 hot dog buns, or 10 hamburger buns
1/2 cup water (105 to 110 degrees)
3 tbsp sugar
1 package of active dry yeast (2-1/4 tsp)
1/2 cup warm milk
2 eggs
1 1/4 teaspoons salt
3 tbsp melted unsalted butter
3 cups (12 3/4 ounces) All-Purpose Flour
1/4 cup potato flour OR 1/2 cup instant mashed potato flakes
3 tbsp melted unsalted butter for brushing tops
For 2 loaves of bread, or 10 hot dog buns and 10 hamburger buns:
1 cup warm water (105 to 110 degrees)
6 tbsp sugar
1 tbsp active-dry yeast
1 cup warm milk
3 eggs
1 tbsp salt
6 tbsp melted unsalted butter
6 cups all-purpose flour (can substitute bread flour)
1/2 cup potato flour 1 cup of potato flakes
Make the Dough:
- In large mixing bowl, dissolve sugar in water. Sprinkle yeast on top and stir. Let sit for 10 to 15 minutes, until foamy.
- Whisk into yeast mixture milk, eggs, salt and melted butter; add flour and potato flour/flakes. Mix well, pulling dough away from sides of bowl and form into ball.
- Place bowl in stand mixer with dough hooks. Knead for 5 minutes, stopping to manually scrape dry flour mixture into the center, and until dough is soft and sticky (sweetened dough does not require as much kneading). Otherwise, knead by hand for 8 minutes. If the dough sticks to a silicone spatula add a little more flour.
- Place dough in stand mixer and mix dough for 5 minutes, 8 if kneading by hand
- Transfer dough to a lightly floured surface. I use my new Norpro Silicone Pastry Mat with Measurements. Dough will be sticky and elastic but will not stick to your fingers.
- Transfer kneaded dough to floured surface
- Knead a few times and form dough into a round ball, tucking loose ends underneath.
- Wipe out stand mixer bowl and drizzle or spray bowl with olive oil. Place dough in bowl and turn over until thinly coated with oil on all sides. Cover bowl with foil, plastic wrap or a towel (not terry cloth). Let dough rise in a warm place for 1 to 2 hours, until doubled in size. For the 3-cup flour recipe, I like to use an 8-cup Pyrex measuring bowl so I can see how much it has risen. With my large stand mixer bowl, the 6-cup flour recipe rises to just above the top of the bowl (see photo).
- Punch down (let the air out) and transfer risen dough from bowl to floured work surface. Divide in half.
Weighing and Dividing the Dough
- I weighed the dough using my EatSmart Precision Pro Digital Kitchen Scale. It weighed 3.8 lbs., or 61 ounces.
- Then, using my pastry scraper/chopper, I divided this into two sections, 30 ounces for the hot dog buns, and 30 ounces for the hamburger buns. That comes out to approx. 3 oz. per hot dog bun, and 3 oz. per hamburger bun, maybe a little less.
Directions for Hot Dog Buns
- First of all, I am making New England style hot dog buns. If you are familiar with Howard Johnson’s buttery grilled hot dog buns, you’ll know what they are. Unlike regular hot dog buns that are rolled up into individual tube-shaped buns, these are baked in one long rectangle, then sliced on both sides and grilled, along side the hot dogs.
- I just bought a New England style hotdog pan specifically for this recipe. The pan has 10 sections on the bottom, which you don’t see when the dough is spread into the pan.
- So, like I said, instead of rolling up individual buns, I rolled out the 30-ounce section of dough into a long rectangle, 6″ x 15″. I placed the dough into the pan, pushing it into all four corners, and leveling it as much as I could. Cover with lightly oiled plastic wrap and let rise for 45 minutes, or until the dough reaches the top of the pan.
- Brush melted butter along the top of the buns. Bake at 350 degrees for 15 minutes, or until golden brown.
- Let the pan sit for 10 minutes, and then turn it out onto a wire cooling rack. Let cool completely.
- The buns rose a bit more than I expected, so after they cooled, I trimmed off some of the excess. They still turned out pretty good. Slice buns along indentations. Then, slice down the center of each bun, but not all the way.
Grilling the Hot Dogs
- To grill hot dog buns, brush all sides with melted butter and place on grill or skillet, along side hot dogs, and grill until nice and toasty.
- Then, brush inside of each bun with melted butter, add grilled hot dog and favorite condiments.
These grilled hot dogs are so good! I will never buy another hot dog bun again.
Directions for Hamburger Buns
- Form the 30-ounce section of dough into a rectangle approx. 1/2″ thick. Cut into 11 or 12 pieces using a 3-1/2″ cookie cutter. These fit my muffin-top pan perfectly, except that it only holds 6 buns at a time. I was able to make four more with the remaining dough.
- Cover with lightly oiled plastic wrap and let rise for 25 to 45 minutes, or until the dough doubles in size.
- Whisk one egg with 2 tablespoons of water and brush top of loaf with egg mixture. This will give it a nice shiny glow.
- Bake at 350 degrees for 15 minutes, or until golden brown. Let sit for 10 minutes. Turn out onto a cooling rack and serve warm or cool completely before freezing.
If you choose to bake bread instead of buns, follow these directions:
Directions for One Loaf of Bread
- Form the 30-ounce section of dough into a loaf, approximately 9″ x 5″. Place into lightly oiled loaf pan. Cover with lightly oiled plastic wrap and let dough rise again for about 30 minutes, until it rises about one inch above the loaf pan.
- Whisk one egg with 2 tablespoons of water and brush top of loaf with egg mixture. This will give it a nice shiny glow.
- Bake at 350 degrees for 30 minutes, or until golden brown. Let sit for 10 minutes. Turn out onto a cooling rack and serve warm or cool completely before freezing.
This recipe was adapted from Allrecipes’ Chef John’s Hamburger Buns and Hot Dog Buns recipes, as well as King Arthur Flour’s Buttery Hot Dog Buns
Check out my post, I’m Re-Learning How To Make Bread, for some tips that I picked up in the last week or so while I have been re-learning how to make bread. The information that I came across helped me understand how each ingredient affects bread baking. It is from this research that I developed “My Favorite Hamburger and Hot Dog Bun Recipe.”