


My Experience with Five-Gallon Bucket Gardening
 I followed a post where one of my Facebook Friends started his first five-gallon bucket tomatoes. I was thrilled because I had been contemplating growing vegetables from pots. I knew the pot had to be large, but the ceramic pots were so expensive I didn’t want to invest too much money in a project that might not do well.
You see, I do not have a green thumb and have a habit of killing plants, usually for lack of watering. I promised myself that I would give this a try and see it through to harvest. Please say a small prayer for me and my garden, it certainly couldn’t hurt. 🙂
Before I even started, my Facebook friend gave me a few bucket gardening tips that he learned.
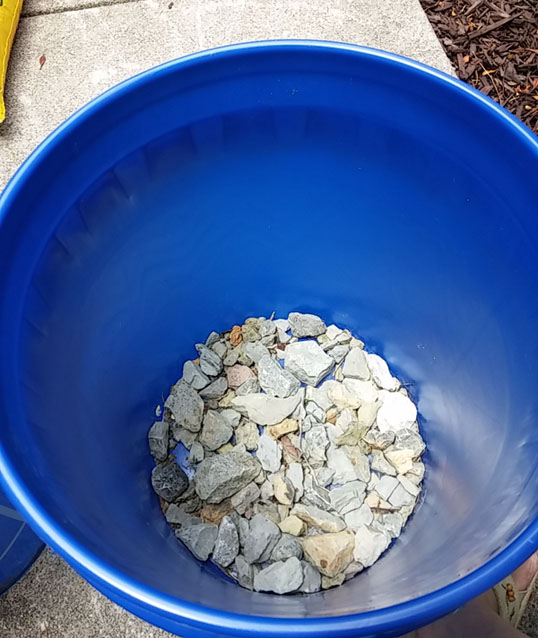
First, he drilled a few holes on the outside of the five-gallon buckets just above the bottom, and then lined the bottom of each bucket with gravel. He then mixed top soil and peat moss and planted his tomatoes.
Then, he said that when he waters his plants, he soaks them each time. He said that they drain quickly and dry out when it’s very hot out. I agree with this; however, if you notice your tomatoes splitting, it means they are getting too much water, so I believe it is better to have too little than too much water.
Buying the Plants and Supplies
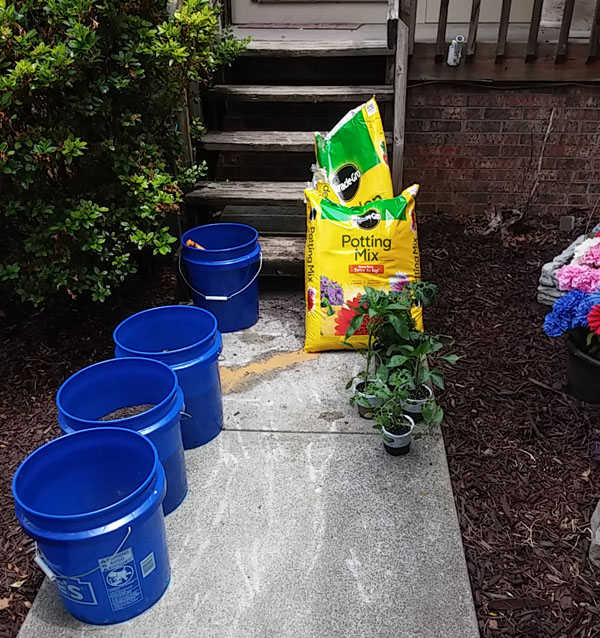
So, on 5/31/15, I went to Lowe’s to purchase my plants and supplies.
- They had all of the vegetable plants outside the garden center, and since I didn’t have a cart I figured I would get the other necessities first and come back for the plants.
- I went inside Lowe’s and found the 5-gallon buckets in the paint department and a few paint stirrers (yard sticks) that I could use to measure the plant growth. The plants would also need to be staked, so I thought the yard sticks would help do that. I may have to get wire cages later on.
- I then went back to the garden center to get the soil. Oh, my goodness! They had so many different types of soil, I didn’t know what to get. I figured I’d buy the Miracle Gro brand since it would take a miracle for me to grow anything to fruition!
- I settled on a large 2 cubic feet of Miracle Gro Garden Soil, and a smaller 32-quart (1 cubic foot?) bag of Potting Mix. I read that a 5-gallon bucket takes .67 cubic feet, which means 2 cu. ft. will fill three buckets. Since I also bought the potting mix, I should have enough for four buckets with some left over.
- Well, as I was loading the soil onto the bottom of my cart (not an easy task for me, next time I’ll get it delivered from Amazon.com), the sky darkened and the wind picked up. A storm was coming through.
- As I headed toward the garden center gate toward the vegetable plants, I noticed the gate was closed and the cashier had left. They closed the gate because of the storm.
- So, I went back into the main store and paid for my items. It was raining by then and it was a longer walk to my van, which was parked by the garden center. So, I hurried to my van and unloaded the soil and buckets. While getting soaked in the rain, I went back with my cart and selectepad the vegetable plants, two tomatoes and two bell peppers. I ran back in the store, paid for my plants, and ran back to my van. By this time I was soaked. Luckily, I had a towel in the van and could dry off a bit before driving home.
Since it was raining, I would wait until the next day to plant my vegetables.
Materials:
- 4 Lowe’s 5-gallon buckets – $2.98 each, total $11.92
- 3 yard sticks – $.98 each, total $2.94
- 2 cu. ft. Miracle Gro Garden Soil – $7.97
- 32 quarts Miracle Gro Potting Mix (1 cu. ft.) – $9.97
- Jobe’s Tomato Plant Food – $4.97
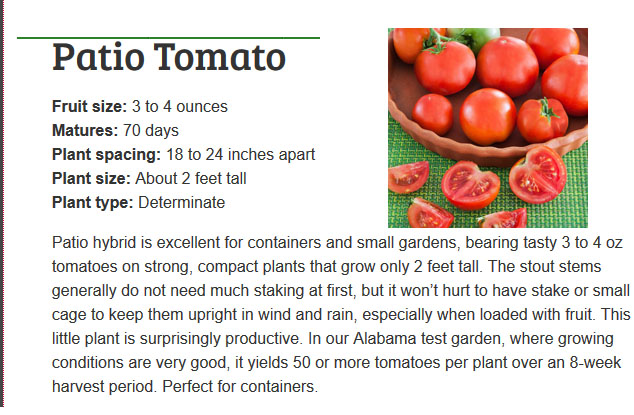
- 1 larger Bonnie patio tomato plant – $5.98
- 1 small Bonnie Tomato plant – $2.50
- 2 small Bonnie Bell Pepper plants – $2.50 each, total $5.00
- Total amount spent – $51.25 plus tax
This sure beats paying $20 – $30 for each 5-gallon ceramic pot.

Prepping the Five-Gallon Buckets
- So, the next day, 6/1/15, the first thing I did was to drill the holes in each bucket. I stumbled around the garage, going through my husband’s tool chests just to find the drill bits. I don’t know what size it was, but I’m guessing about 3/8″ inch wide. I drilled four holes in each bucket.
- Then, with the help of my son, Robert, we dug up some gravel that was on the side of the house. This turned out to be a messy job because the gravel was embedded in clay and grass and had to be rinsed and separated so I wouldn’t have grass or weeds in my potted plants.
- I then poured a layer of gravel at the bottom of each pot.
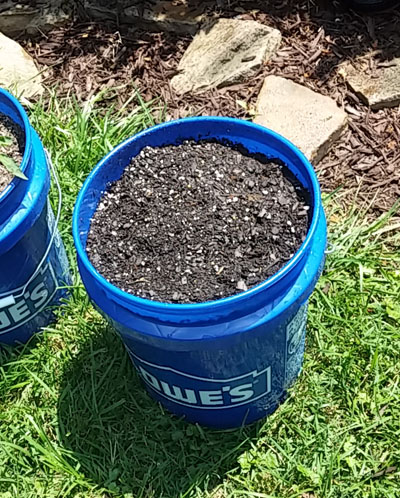
Adding the Soil
- I filled each bucket about 2/3 full of the garden soil.
- I mixed in about 1/4 cup of the tomato plant food.
- I then started to work in the potting mix into the top three or four inches of garden soil, filling it to a couple of inches from the top.
- I sprinkled a small handful of tomato plant food and worked it into the top layer of potting mix
- I removed the large tomato plant from it’s pot and loosened the bottom roots a bit before planting it into a hole large enough to hold the root ball, and patted the soil down just below the first tomato leaf.
- The remaining starter pots were Bonnie pots that were biodegradable. I removed the outer plastic label, wet the pot, peeled off the bottom, and placed it into a hole large enough to just cover the pot, just below the first leaf.
So, for now, I have three buckets. I planted two tomato plants, one plant per bucket, and two bell pepper plants in one bucket. I also plan to use the fourth bucket for green beans that I am starting from seed (hopefully). I am attempting to germinate the seeds, so I hope that works out. I should be able to plant 3 or 4 beans per bucket.
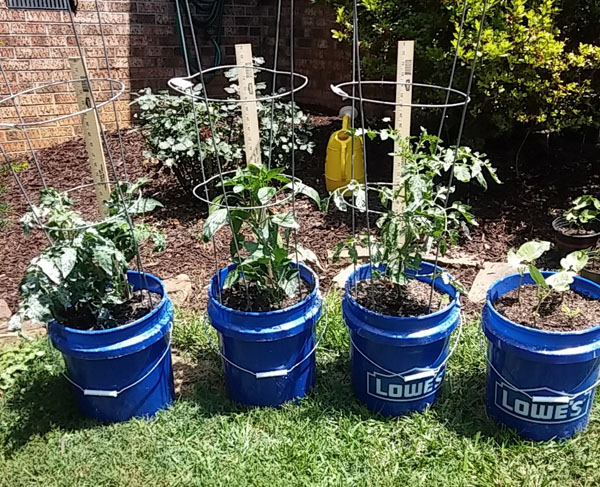
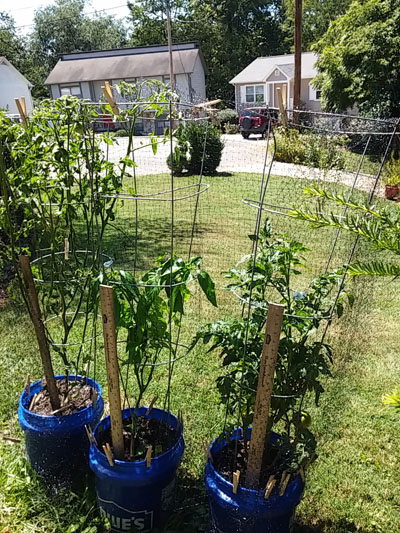
Staking the Vegetables
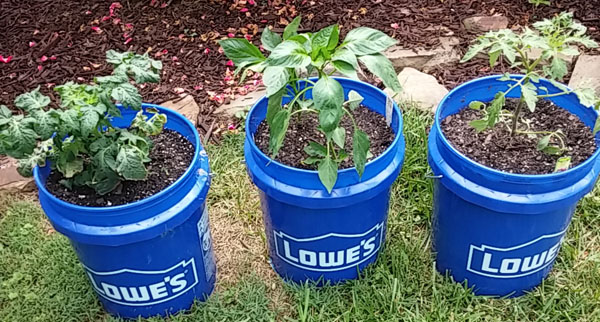
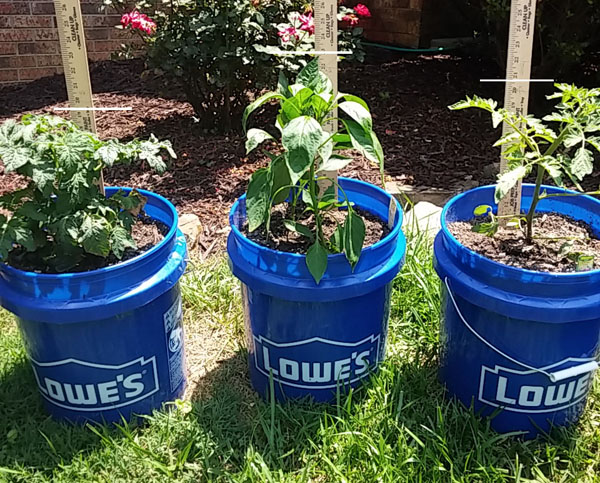
Staked Bucket Vegetables – Tomatoes and Bell Peppers
After staking the vegetables, I measured and marked the growth. I took these photos on 6/3/15, which was two days after purchase from Lowe’s. All measurements include the size of the 5-gallon buckets, which are approx. 14″ tall.
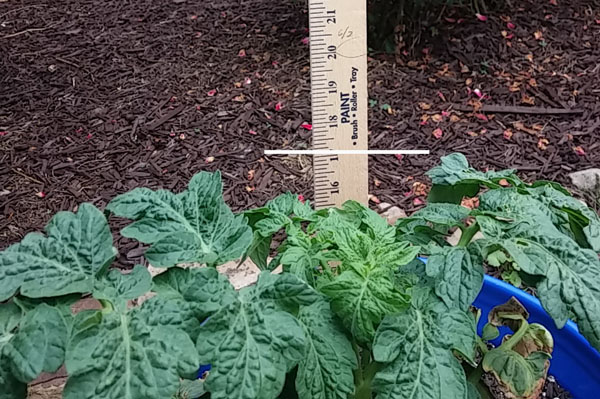
Patio Tomatoes – approx. 17″ tall
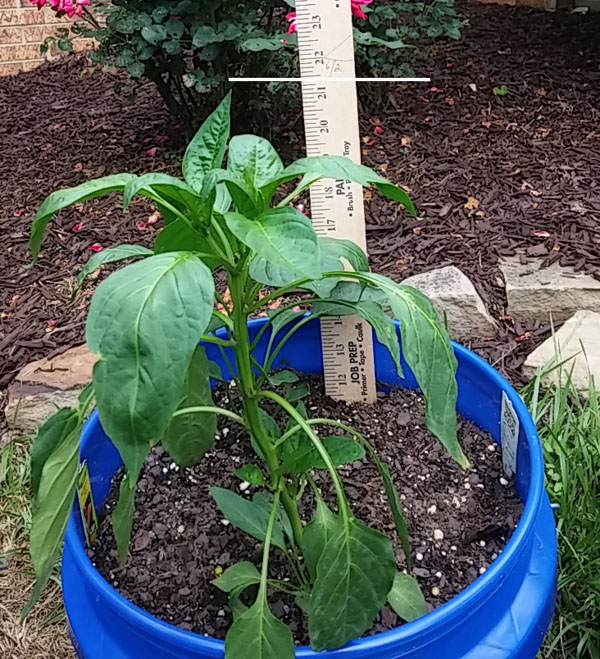
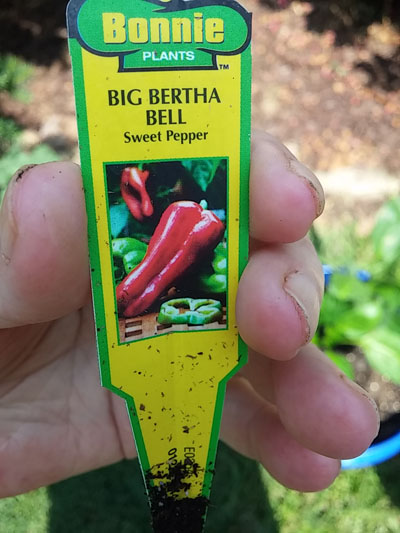
Big Bertha Bell Peppers – approx. 21″ tall
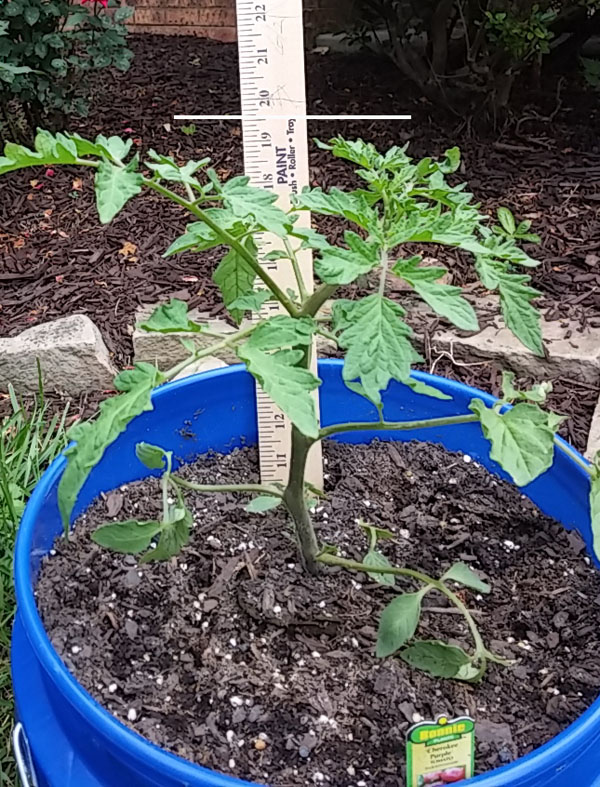
Cherokee Purple Tomatoes – approx. 19-1/2″ tall

Today, 6/6/15, I took the following photos to compare to those taken three days earlier, not really expecting to see any difference.
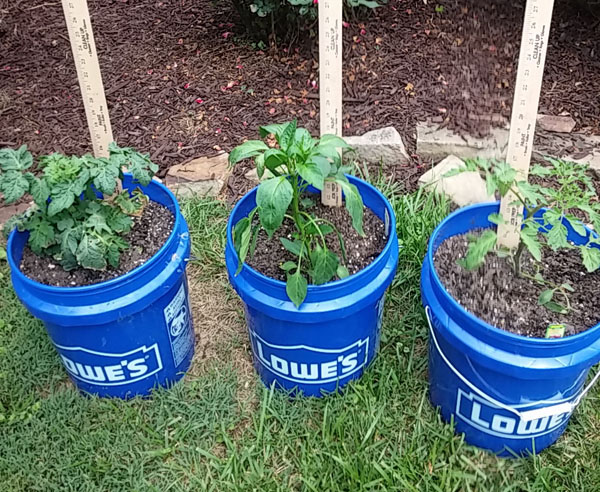
Staked Bucket Vegetables – Tomatoes and Bell Peppers – 060615
Patio Tomatoes – approx. 19-1/2″ tall, no difference.
Big Bertha Bell Peppers – approx. 22″ tall, 1″ taller.
Cherokee Purple Tomatoes – approx. 20-3/4″ tall, 1-1/4″ taller.
So, the Patio tomatoes (left) grow slow, and are only expected to get between 2-4 feet tall. The Big Bertha bell peppers (center) grew one inch in three days, and are expected to get between 3-5 feet tall. The Cherokee Purple tomatoes grow faster and are expected to get between 4-6 feet tall.
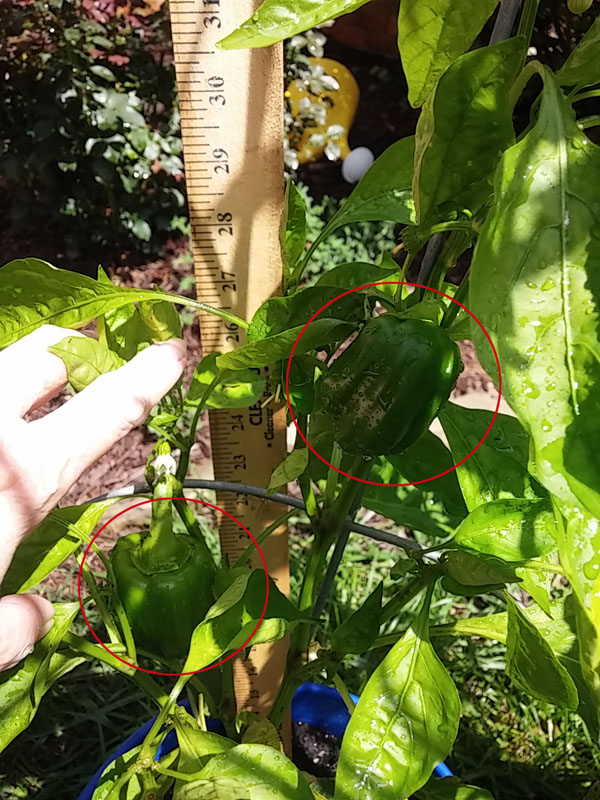
Well, the honeymoon is over. I came out this morning, 7/11/15, to find that something is eating my plants, and possibly something else is going on as well.
I haven’t quite identified the problems, but I am determined to find a solution. In the meantime, I looked for obvious sitings of insects, such as aphids, caterpillars, mites, snails, slugs, thrips, etc., but there wasn’t anything so obvious. Maybe they only come out at night or very early morning? There is something chewing on the leaves, as there are small holes and torn edges. I also see some small spots on the underside of some of the leaves.
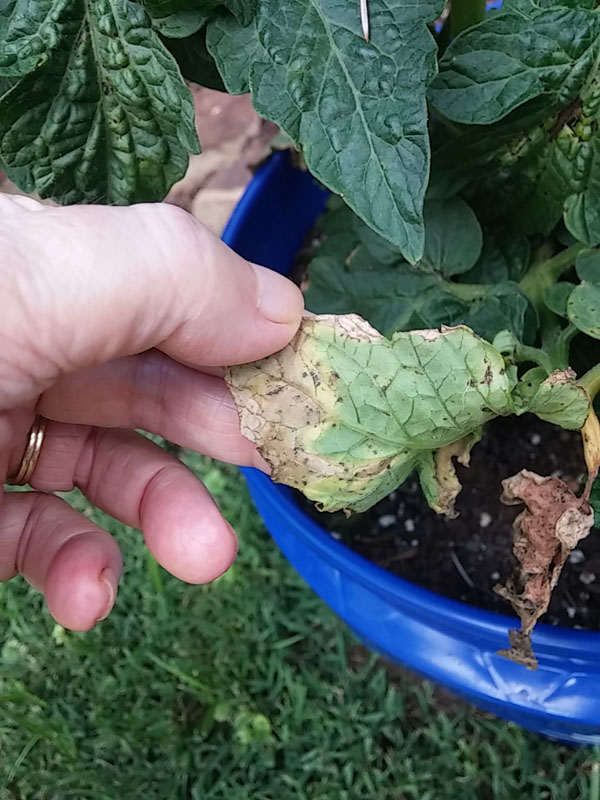
I also see yellowed and curled leaves at the bottom of my patio tomatoes, which indicates something else is happening, too. However, I did read that they will go bad if touching the soil.

 |
 |
Also, the black color at the joints of my bell pepper stems was worrisome, but I read that for some peppers, purple or black stems are normal as long as the plant looks healthy. I think it looks pretty healthy, so far.

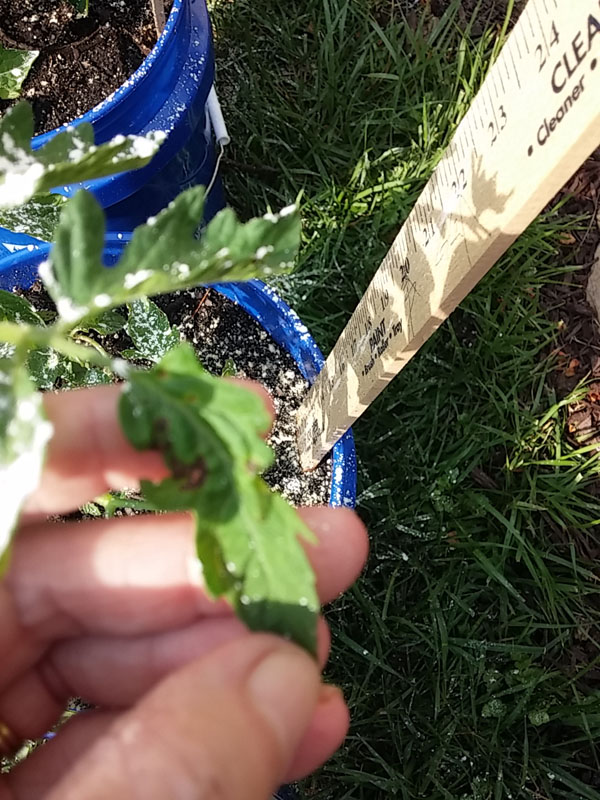
I had some diatomaceous earth on hand, so I spread some over all of the plants, hoping that it would kill off the culprits. Meanwhile, I ordered some neem oil and insecticide soap that is supposed to help.
If anyone can help me identify these problems, please comment below. Thank you!
Over the weekend, 6/15/15, I pruned most of the dead, curled, yellowed leaves from the bottom of the patio tomatoes. Then, after watering all of the plants, I sprayed them with insecticidal soap and sprinkled them with more diatomaceous earth. It doesn’t seem to be interfering with the growth, so I will continue to use the d-earth until I’m sure the pests are under control. I also mixed up some epsom salts with warm water and added it to the soil. I’m still waiting for the neem oil I ordered, but I think I’m okay without it for now.
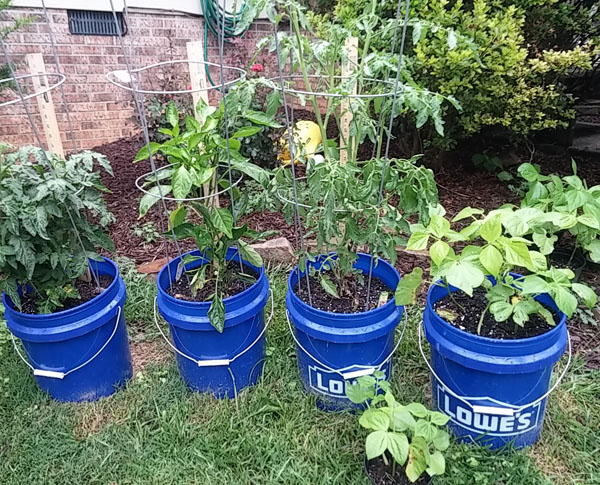
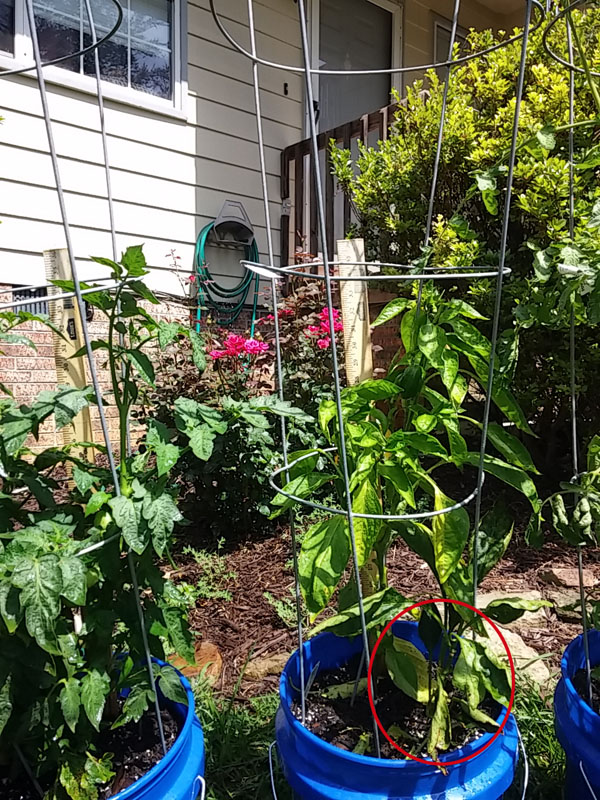
We caged three of the plants on Sunday. I know it’s a bit early but I wanted to put the cages on while it was still manageable. Any taller or bushier and it wouldn’t be so easy. They do look a bit small compared to the high cages, but I am being optimistic. 🙂
I took more photos today to show the growth.
Patio tomatoes are now about 24-1/2″ tall, green peppers are 25″ tall, and the Cherokee Heirloom tomatoes are about 28-1/2″ tall.
Starting the Green Bean Seeds:
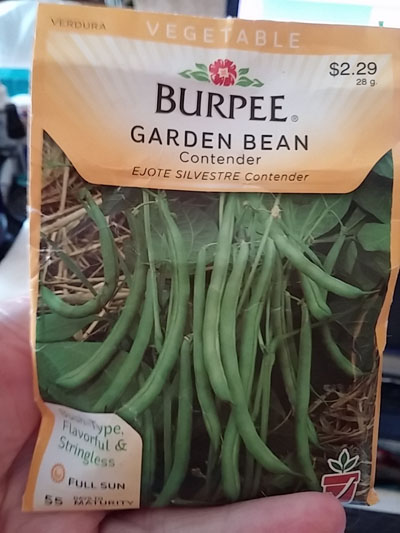
Since I couldn’t find the green bean plants at Lowe’s, I decided to use the seeds that I bought last year. They supposedly expired in 11/14, but I figured I’d give it a try.
On 6/1/15, I placed the seeds on paper towels, folded them, wet them with luke warm water, and set them on my kitchen window sill to germinate. It is a nice warm place without direct sunlight.
Two days later, 6/3/15, only one of them sprouted roots. So, thinking that maybe the rest of the seeds were bad, I added four more seeds. The next day, 6/4/15, several more sprouted! Not bad for only three days.
I need at least four seeds to plant in my five-gallon bucket.
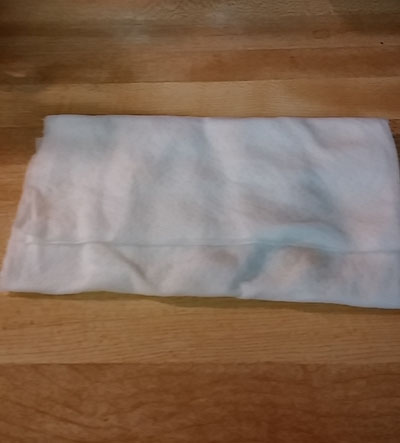
Green bean seeds wrapped in wet paper towels
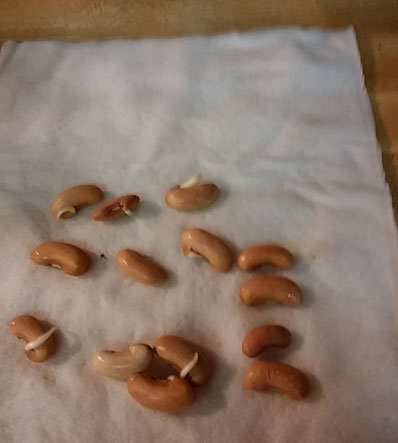
Germinating green bean seeds – 6, so far!
Update on Green Beans
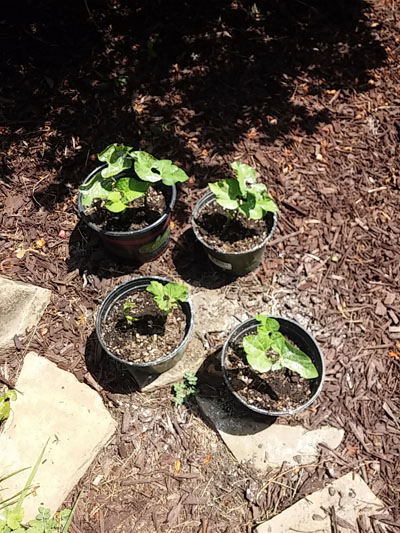
Today, 6/6/15, I planted my green beans – all 14 of them!. That’s right, 14 seeds germinated in only five days!
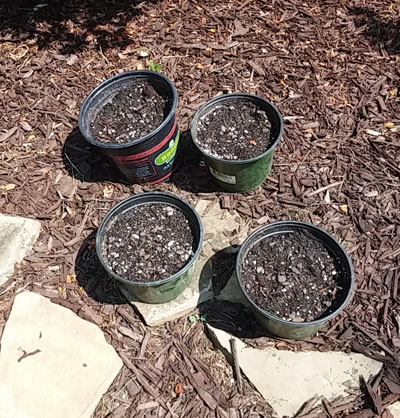
So, I decided to pot all of them since I wasn’t sure how many of them would turn out to be viable.
I planted four seeds in the 5-gallon bucket, and two or three seeds in each of the smaller pots.
 |
 |
 |
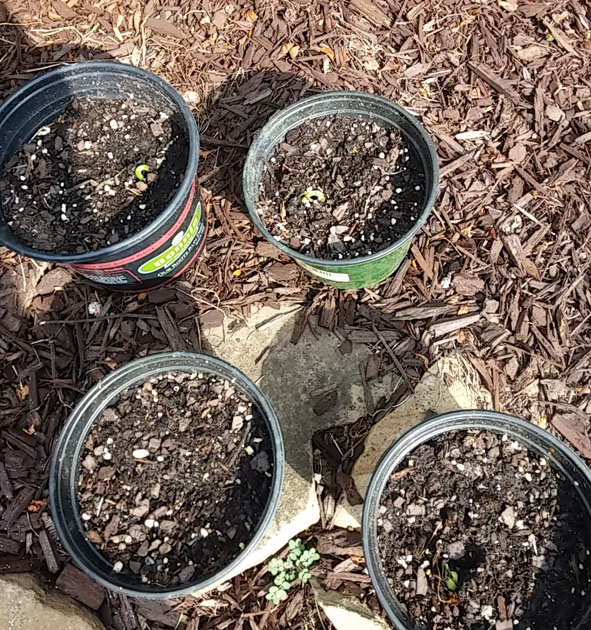
Today, 6/11/15, Three new plants are coming along in the 5-gallon bucket, and three new seedlings appeared in the smaller pots. As you can see, I sprinkled some diatomaceous earth (D-Earth) on my plants, as explained above.

Update – 6/15/15
The green beans are growing fast. I’m going to have to transplant the ones in the small pots if I want to keep that many green beans. I read somewhere that I would need 12 green bean plants per person.
Will Diatomaceous Earth Hurt Honey Bees?
My husband was outside this evening talking to our next door neighbor. I knew he was growing some vegetables in his front yard, so I asked my husband to tell him about my experience with my vegetable garden and ask whether he had any problems with pests or disease.
He said that he has fa few chewed leaves now and then, but he hasn’t had too many problems with pests. He did say that he had problems with slugs in the past. He also raises bees in his back yard, which I had completely forgotten about. It never occurred to me to think about the bees, or the impact that my efforts to rid my plants of pests would have on them.
He told my husband that the diatomaceous earth could be harmful to the bees if I continued to use it when the plants were flowering. I have read conflicting opinions about the effect d-earth has on bees. The furry hairs on the bees help protect it, but thicker layers of d-earth can harm them. I just blindly powdered my plants with d-earth, without thinking about it. Now that I know it could be harmful, I have decided to use it with caution, and only for serious infestations. It is okay to spread it on the ground around the plants, which should keep the slugs and other insects away.
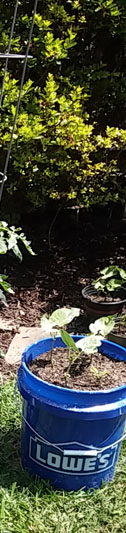
7/1/15 – My green peppers and Cherokee heirloom tomatoes (second and third from the left) are looking kind of scraggly, so I gave them plenty of water and sprayed them with neem oil mixture. The green bean plant leaves are going crazy, with lots of flowers and buds, but no green beans, yet. It’s still early since I started these from seed a month ago.
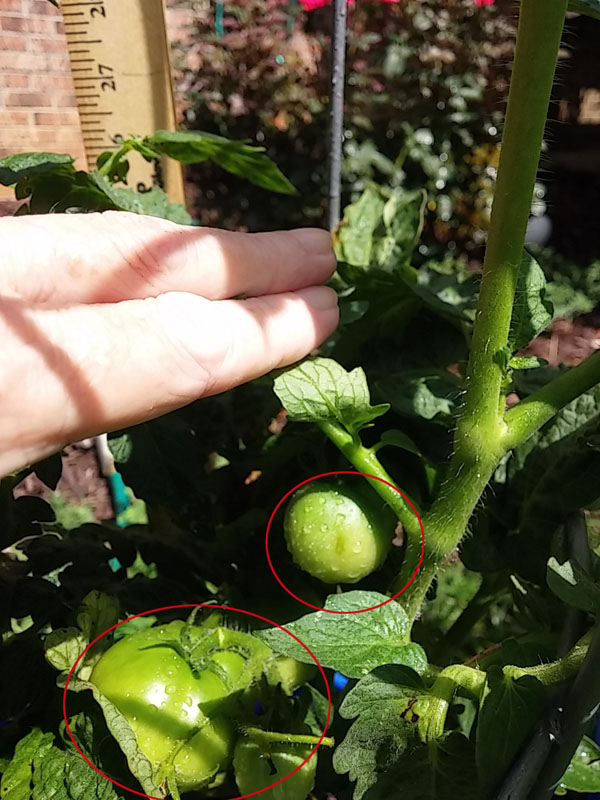
7/10/15 – My patio tomatoes are thriving. There are 8 or 9 good-sized tomatoes already, but you can’t see them for all the leaves.
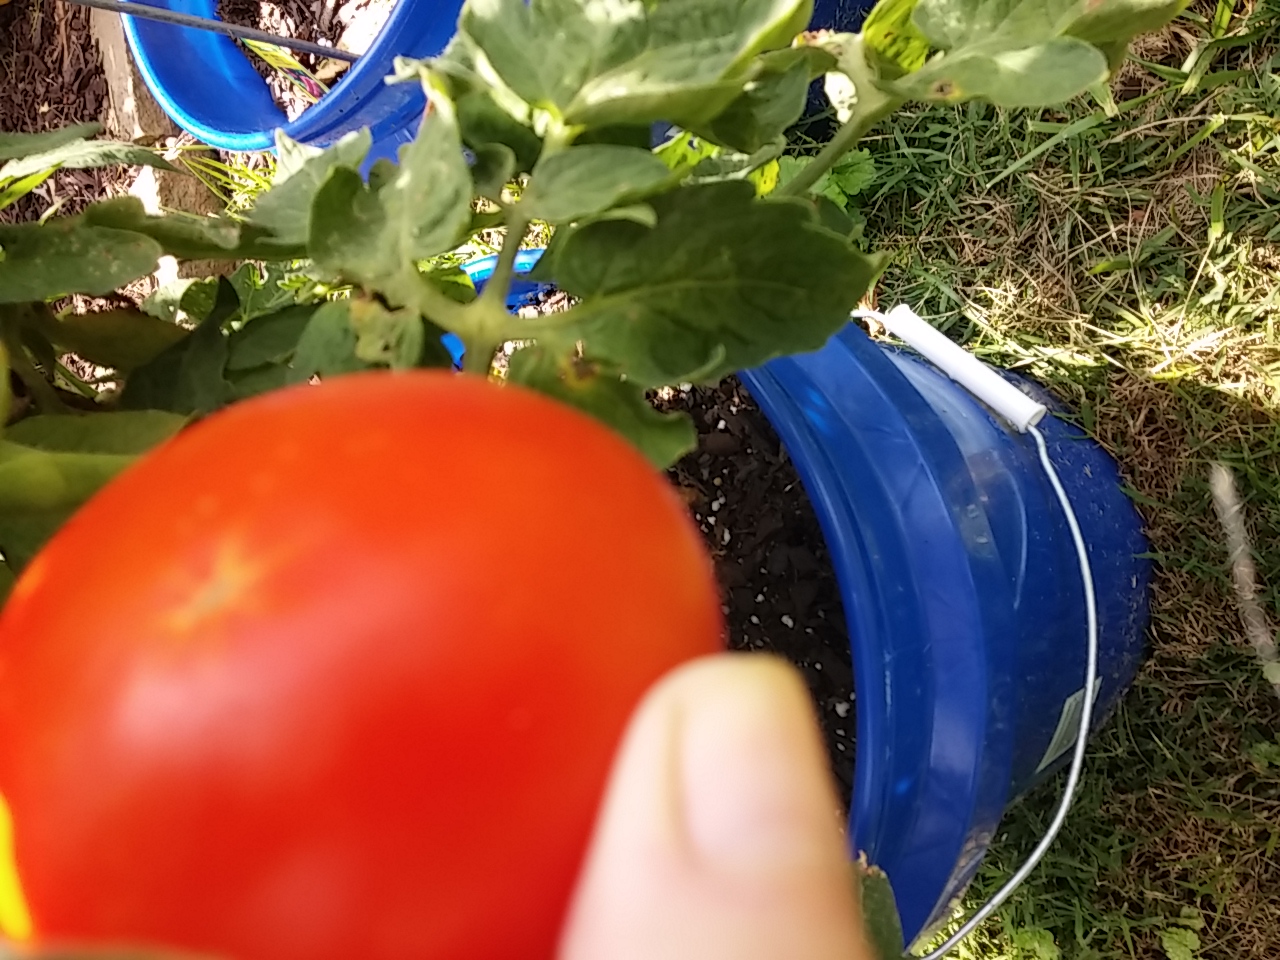
By 7/26/15 my patio tomatoes were ripening and I picked my first tomato!
So far, there are only two or three peppers on one plant. The other plant is dying. Perhaps, I should have only planted one per pot.
One thing that I had to do was cover my cages with bird netting. The birds kept pecking at my juicy tomatoes. The netting worked like a charm and kept the birds away. I also made sure the birds had plenty of water to drink.
Easy Gardener 604 BirdBlock Netting
Update – Check out my 2016 Five-Gallon Bucket Garden
More Garden Planting Tools


Latest posts by Susan (see all)
- My Second 5-Gallon Bucket Garden – Tomatoes, Red Bells, Green Beans and Herbs - June 25, 2016
- Roasted Eggplant Parmesan – Plus a couple of simple low carb recipes with Eggplant! - September 16, 2015
- Cauliflower Mac & Cheese - August 21, 2015